I hope you’re enjoying our massive 3 part series on magic tricks! Welcome to the third and final installment in the Complete Card Magic Blueprint. If you are practicing your sleight of hand right now… don’t put down your deck… but make sure you check out all 3 parts!
Complete Card Magic Blueprint
This Blueprint is your fast-path to easy card tricks! It shows you every sleight you’ll need to do great magic, and more important, exactly why each one matters.
Just by reading our Blueprint, you’ll save yourself hours of frustration, confusion and wasted practice time on techniques that you don’t really need. In the long run, you’ll have even more fun with your magic, and your audiences will be even more astonished when you perform.
If haven’t read the first two installments of this Blueprint, use the links above to read them first. This post deals with ‘Advanced Techniques’, and this article will make them much easier to learn.
But as you’ll see, the secrets to making the ‘difficult’ look easy lay in how you approach the fundamental card magic concepts we cover in the first two parts of this Blueprint!
Okay… I’ll pause here so you can go read the first two parts of the Blueprint. Don’t worry, I’ll be very patient…:-)
Congratulations! Expert ‘Sleight of Hand’ Will Be Easy!
Sleight of hand easy? You may be thinking I am making a bold claim!
Now that you’ve learned the genuine secrets in the first two parts of this plan, you are in for a very big treat. The ‘simple’ Double Turnover is actually far more challenging to perform than the so-called Expert Level Sleight of Hand.
In fact, armed with the knowledge you now possess, you’re about to discover that the most powerful sleights in all of card magic are not as difficult to master as you may think.
You’ll see EXACTLY how they fit into the ‘big picture’ of your card magic, and as I’m about to reveal, that information absolutely eliminates the unnecessary frustration magicians experience when they tackle the techniques you’re about to discover.
Consider one fascinating thing these sleights have in common:
- The Classic Pass
- The Gravity Half Pass
- The Top Palms
- The Bottom Palm
- The Side Steal
- The Diagonal Palm Shift
- The Top Change
These ‘sleight of hand moves’ fascinate the inner magician in each of us because of one main feature they all share:
Anytime you witness a performer who can demonstrate one of these moves in person, a mere demonstration of the sleight itself actually feels like real magic. And once you know the ‘basic idea’ behind the mechanics of the Classic Pass or Top Change, it’s even more amazing to witness.
The first time I saw a magician who could really do these moves, over 20 years ago, I couldn’t believe my eyes. My face looked as though I’d just seen a fire-breathing dragon flying above my house!
Surrender the Idea of Invisible Sleight of Hand. It’s an Illusion.
When these sleights are performed properly, they seem invisible. However, when we practice them, we find invisibility to be an all but impossible goal. This approach leads to unnecessary ‘sleight of hand frustration’.
In fact, this illusion is encouraged by on-screen ‘move demos’. In live performance, these sleights DO NOT rely on invisibility for success.
That’s great news for your success. Don’t strive for ‘invisibility’, or wait to acheive it in practice before you start using these sleights in your performance.
Instead, focus on far more important goals that are not only realistic, but actually easy in comparison. For a move like the Classic Pass to be effective, it must be silent, effortless and economical – each secret action must take less than a single moment to complete…without rushing.
Finish the sleight before your ‘moment of misdirection’ expires and thanks to your quiet, relaxed execution, you won’t have any noises or tension to draw your audience’s eyes to the pack as you perform it.
If you learn the sleights in this part of the Blueprint in this way, people will soon be saying you perform these sleights ‘invisibly’.
But in truth, you’ll have mastered the illusion of invisibility. And that’s what makes the sleights that follow seem so impossible.
Advanced Sleights Make Direct Miracles
Unlike the Open Action Sleight Clusters we covered in Part 2, the techniques that follow do not take place as you seem to turn over the deck (Invisible Turnover Pass) or display the top card of the pack (Double Turnover).
I DO NOT recommend the advanced techniques that follow because they’re challenging, or because they’re ‘cool’. In fact, as you go through this final part of our Blueprint, you’ll see that I’ve only included a small number of sleights for your consideration.
Each of the sleight of hand moves that follow are direct and economical. After learning about deceptive Double Turnovers in Part 2 of this plan, you’ll be very glad to discover that most of these techniques require a secret break and only one other Secret Action.
To the audience, It will seem as if you’ve barely handled the cards. And as you’ll discover, this one feature can have an extremely powerful impact on your audience’s experience when you perform.
The Classic Pass
The Classic Pass, or as it is titled in The Expert at the Card Table , The Two Handed Shift, allows you secretly to cut the pack as you seem to do nothing at all. This one sleight can be used to force, switch, control or force any number of cards.
In fact, the Classic Pass is the most dynamic, adaptable secret move in magic. It always has been. For that reason, the Classic Pass was considered ‘the backbone’ of card magic for centuries. And once you start using it, you’ll find it to be one of the most useful sleights in your entire repertoire.
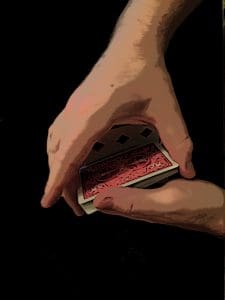
Here’s a tutorial sharing a powerful, little known secret to performing an imperceptible Classic Pass:
In my Pathways Training System , we use unique training methods and specific strategies to help passionate magicians master the shift quickly.
However, you can find the basic technique I teach under the name, The Two Handed Shift in The Expert at the Card Table, by S.W. Erdnase.
Our Pathways Training goes into great detail about every aspect of mastering this sleight. There’s over an hour of training on this one move, that in performance, takes less than a moment to perform.
Solving Sleight of Hand Frustration
At some point during your practice, you’ll become frustrated and unsure. That’s when most magicians become susceptible to ad-copy or youtube demonstrations that promise an easier method.
If you’ve already had this experience, you’re not alone. I’ve done it. And so has every great magician I know.
You’ll be tempted by variations that seem a lot easier to master. For example, for longer than I’ve been in magic, magicians have used a riffle of the front end of the deck with the right fingers to make the pass more ‘invisible’.
However, I’ve seen less than 5 who can perform a riffle type pass softly enough to avoid drawing focus to the deck.
Remember what you’ve already learned from this Blueprint. The Riffle Action is an Open Action. On top of that, it makes a sound on purpose!
The sound and the Open Action actually FORCE your audience to look at the deck…and at exactly the wrong moment.
You can find my complete video training on The Classic Pass and the other items in this Blueprint, in my new improved Pathways Training System.
In 12 Volumes and over 13 hours of instruction, you’ll discover a unique approach to learning that makes The Classic Pass, and every other sleight, easier than ever before to master.
Click Here to find out more about the Pathways Training System.
The Half Pass
The Half Pass works a lot like the Classic Pass, and allows you to reverse any number of cards at the bottom of the deck, from one card, to all the cards beneath the top card of the deck.
Like the Classic Pass, The Half Pass can be totally imperceptible from any angle for an unlimited number of spectators.
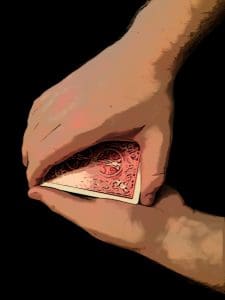
In this case, I can proudly recommend my own technique, The Gravity Half Pass, which first appeared in my 2002 book The Paper Engine. I’m fortunate that experts all over the world still agree this is the best ever devised.
You can see a demonstration of the Gravity Half Pass in the original trailer for the Paper Engine here. Pay close attention – it’s used here to create some highly visual magic:
The Gravity Half Pass is actually invisible from every angle. Even more important, and not possible to show on video, it can be performed with no tension and thus, it’s also completely imperceptible. And as we’ve already discussed, that’s what really counts.
Like the Classic Pass, the Gravity Half Pass can be used to force, control, switch or visually reverse cards in the pack. It’s incredibly versatile, and once you get comfortable with it, you’ll use it every day.
The Gravity Half Pass is the exact method I teach in the new Pathways Training Program.
Practice Tip: The Gravity Half Pass was developed from closely following the concepts underlying the Classic Pass. In fact, you’ll be able to make even faster progress by studying the two sleights at the same time.
Use 3M Cross Training to Master…Only Faster!
In my popular 3M Coaching Program, I use the common exercise term ‘Cross-Training’ to describe this principle. In effect, a small breakthrough in any one of the Cross-Trained techniques causes an immediate leap forward in all the others.
Since the Invisible Turnover Pass, the Classic Pass and the Gravity Half Pass are all based on similar mechanical principles, practicing them at the same time gets faster results than working on any one of them alone.
The Top Change
The Top Change is to the Double Turnover what the Classic Pass is to the Invisible Turnover Pass. No open action is required, and nothing seems to change from before to after the switch. There’s not a hint to alert anyone that something suspicious has happened.
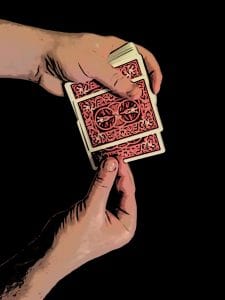
In all appearances, you simply hold the deck in one hand and a card in the other. As you place the card on the table, or on a spectator’s hand (or really, you don’t have to do anything with the card at all), it transforms into another card.
This incredibly powerful technique is not hard to do, but it does test your nerves.
For that reason, I recommend you get very comfortable with the Double Turnover before you add this ultra-direct ‘power tool’ to your belt. When you’re ready, you’ll find the Top Change to be one of the most reliable ‘sleight of hand tools’ in magic.
To learn this sleight, I suggest two versions. First, the method that appears in Expert at The Card Table is very good, as is the David Williamson Method from his first book, Williamson’s Wonders.
The finger positions are different in each of these methods, but both can be performed wonderfully. But in each case, invisibility deserves little thanks.
Success here depends more than ever on misdirection, effective structure and effortless, relaxed execution.
The Complete System Of Palming
Now you’ll discover the most important new concept in this plan. It’s the only idea that can’t be simulated by methods introduced in the first two parts of this Blueprint.
Even if you only master the easiest of the techniques in this section, The Bottom Palm, you’ll be able to accomplish astounding miracles that can’t be accomplished any other way.
Like the passes mentioned above, there’s no change in the deck after any of these Palms are executed. Again, softness and context are far more important than ‘invisibility’ when it comes to this type of sleight of hand.
Remember, no person is an average, and you will undoubtedly experience faster results with some of these techniques than others. When it comes to palming cards, there’s no substitute for experimentation.
The Top Palm
Top Palms are more difficult than Bottom Palms, but despite this fact, most people choose to practice the Top Palm first. I suspect this is because the Top Palm seems, at first glance, to be more practical.
However, when you have a card hidden in your right hand, it’s extremely difficult to hold your hand just as you would if it were actually empty.

Many instructors suggest you hold the deck from above for a few moments after palming. In practice , this is only practical if you have extremely large hands. Even then, it’s pretty easy for audience members to ‘see the goods’.
For these reasons, successful ‘Top Palmers’ nearly always steal the cards from the deck immediately after palming.
Stealing the palmed cards away from the deck is called retiring, and while you’ll find it takes a bit of courage with ANY palm, you can cover the action by using the other hand to pass out the cards for shuffling, or by placing them on the table.
Ultimately, the Top Palm is a helpful sleight of hand method in many situations. However, I mention it here first – primarily to get it out of the way. There will be plenty of time to master a Top Palm after you’ve experienced the success and confidence that come from starting with a much more practical approach.
The Bottom Palm
I suggest you begin your journey to masterful palming with The Bottom Palm because of several big advantages it has over the more popular Top Palm.
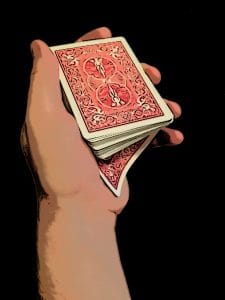
First, the Bottom Palm is easier to learn. Second, you can keep the deck in your left hand, above the palmed card, for as long as like. It looks as though the deck sits normally in your hand.
In performance, this will make it very easy to retire with the palmed cards because you can wait for as long as you like, without fear of detection.
In the Pathways System, you’ll discover many of my favorite Bottom Palm methods. But why wait? Start using my easiest method right now, which appears in one of our most popular posts here.
Side Steals and Diagonal Palm Shifts
Side Steals and Diagonal Palm Shifts allow you to palm a card or cards directly into either hand from any position in the pack.
Left and Right Hand Steals use the exact same palm positions as the Bottom and Top Palm – and they become most helpful in situations where you want to steal the card(s) from the pack without first shuffling or passing them to the top or bottom of the deck.
Remember, in most cases, 90% of the final effect on the audience will be easily achieved using only a Top or Bottom palm. Surprisingly few effects demand such directness.
Miracles like Card to Pocket , Card to Wallet and any effect where four-of-kind are produced from an audience shuffled pack can all be performed, with roughly the same impact, using only a Top or Bottom Palm.
How Palming Skills Progress
With a little practice, you’ll be able to use the Autopilot Card to Pocket in performance. You’ll be able to not only palm a card, but imperceptibly retire with that card to your pocket.
As you perform the Card to Pocket regularly, you’ll acquire the confidence to retire without moving immediately to your pocket. After a few months, you’ll one day feel bold enough to relax with the palmed cards to your side or in your lap.
This may seem ambitious now, but you’ll be surprised at how quickly you develop the ‘sleight of hand confidence‘ to ‘hold out’ cards while the audience shuffles.
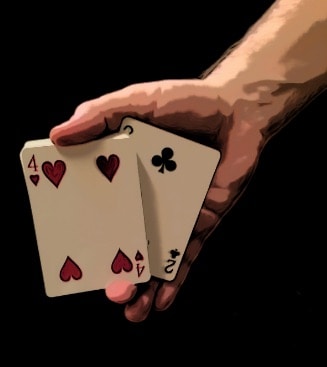
The image above shows a card midway through the Side-Steal Sleight Cluster
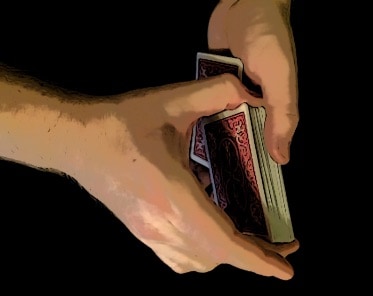
This image shows a card midway through the Diagonal Palm Shift, otherwise known as a Left Hand Side Steal
The first time you ‘hold out’, you’ll be so pleased and amazed that you may nearly give yourself an award!
But in short order, you’ll begin to rely on this tactic all the time!
And that means you’ll need to start covering your tracks. Once you start using palms in your sleight of hand, for a variety of effects, including multi-phase routines like “Card to Pocket”, you’ll positively NEED alternate methods to keep the audience off your trail.
For that reason, Side Steals and Diagonal Palm Shifts will ultimately play a crucial role in your advancing repertoire. However, don’t hurry the process.
Just as each stage of this Blueprint has led to the next, the left and right hand palming positions you learn at first will become second nature as you use them. It doesn’t take very long.
And you’ll discover as you progress, that Side Steals and Diagonal Palm Shifts will actually come to you. You’ll find you’ve already half-learned these incredible sleights before you even practice them.
The Spread Cull
The Spread Cull allows you to spread casually through the deck and to steal any card or cards you want, and to move them secretly to any location you desire. As far as sleight of hand goes… this is very useful!
It’s an astounding tool, but difficult to acquire and perform with real confidence. The best path forward is to focus on developing your Hand to Hand Spread, followed by the Classic Force on the same line.
These techniques develop your ‘spread intelligence’, so that when you’ve acquired many of the techniques in this Blueprint, you’ll be ready master the Spread Cull in short order.
Now You Know the Pathway!
Many valuable techniques and sleight of hand moves do not appear on this Blueprint. I decided to include only the most important, valuable techniques I’ve encountered over the last 20 years.
My hope is that you can use this material to develop your own card magic without wondering what to do, what comes next or if you’re practicing the right things.
Now that you’ve read the whole plan, I suggest you go back and start at Stage One. It Provides a complete suite of card magic tools.
Use those tools to perform amazing magic for anyone you know. Then let those tools, and the micro-skills they include, provide a foundation on which to master first your Stage 2, and then Stage 3 skills as you need them.
I sincerely hope you’ve enjoyed the Complete Card Magic Blueprint – I’ve had a great time developing this material and teaching it to passionate magicians all over the world. And now, it’s yours!
With Warmth,
Aaron Fisher
P.S. Sleight of hand is so rewarding! If this Blueprint has helped you, there’s a VERY good chance that my Pathways Training System can save you hundreds or thousands of practice hours and dollars on your own path to astonishing card magic.
You can find out all about the Pathways Training Program here. You’ll be very glad you did.
(Thanks for reading! I’d love it if you would give a little back and “share” this article to others who might enjoy it. Also, leave your comment or question below and we will read each and every one…)
